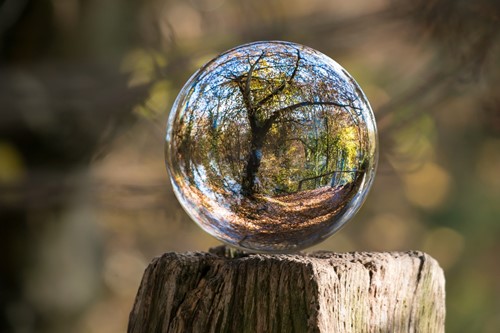
You can find colorful, shiny or subtly decorated orb sculptures in gardens everywhere. Sometimes called garden balls, gazing balls or spheres, these globes have been a popular outdoor decoration for decades. They come in myriad designs, styles and sizes and are very simple to make yourself. Here we’ll go over a few ways to decorate your own garden spheres to add some sparkle and shine to your outdoor space.
One of the great things about this project is that you can use a lot of different materials for the base. For the purpose of this guide, we recommend either using an old bowling ball (sanded down to a matte finish).
That being said, you can make garden balls in a variety of sizes. One visually pleasing idea is to arrange clusters of different sized spheres together in the garden. For these you could use billiard balls or bocce balls along with your larger bowling ball sphere.
You can place your garden ball right onto the ground if you wish or you may use something to hold it up for better visibility. You can use metal plant stands, vases, lamp stands, flower pots, bird baths and more. All you need is something that can support the weight of the bowling ball.
If you want to go with the classic ultra-reflective garden ball, you can do so with only a few materials. All you need is a can of chrome spray paint. Simply cover the bowling ball in as many coats as you want to get the desired level of reflection and shine. Once it’s dry, you’ll have a classic mirrored gazing sphere for a fraction of the cost of buying one from a garden store.
For this type of garden ball you’ll need flat marbles and a strong adhesive. For longest-lasting results, go with silicone sealant. If you want additional materials as “filler” between marbles, you can use colorful aquarium gravel, decorative sand, vase fillers or vase confetti.
To prepare your bowling ball, sand it carefully to remove the glossy surface. This will make it easier for the adhesive to grip onto the surface. You may also wish to paint it another color. If you’re using translucent marbles, keep in mind that the background color will be somewhat visible.
If you want to make any sort of design on your garden ball, plan it beforehand. Silicone sealant is permanent once it dries so the more you prepare your design the better. Once you’re ready, start adhering the flat marbles onto the surface of the bowling ball. Work carefully and in sections. Try adding the marbles from the bottom up so that the upper layers can rest on the ones below. If you want to add any filler material, do so before the adhesive dries.
These are just a few ideas for making your own beautiful garden balls. Whether you wish to reflect the world around you in a mirrored surface or create a custom mosaic design with marbles, you’ll end up with a unique piece of decor for your garden or outdoor space.

Thank you for taking a moment to meet Dave Abdallah and his team online!
Dave began his real estate career, with Century 21, over 36 years ago following his graduation from the University of Michigan with a degree in Business Administration where he majored in Finance and Marketing.
Since 2000, Dave and his remarkable group have been recognized as the # 1 team in the Great Lakes Region EVERY YEAR, accumulating 2 Team Centurions Awards, 4 Team Double Centurions Awards and in 2024 their 15th team GRAND Centurion Award. Not to mention the Overall # 1 TOP COMPANY Award for 21 consecutive years.